


Table of Contents
ToggleIf your property lacks reliable broadband or you’re building a security system in a remote location, a 4G SIM card for your security camera might be the solution you’ve been searching for. Unlike traditional cameras that depend on Wi-Fi or wired internet, 4G-enabled models connect directly to cellular networks, giving you real-time alerts and footage access even when your home internet goes down. This guide walks you through what you need to know about 4G SIM cards for security cameras, how to pick the right plan, and how to set everything up without hiring a technician.
Key Takeaways
- A 4G SIM card for security cameras provides independent internet access via cellular networks, allowing your camera to function even when Wi-Fi fails or broadband is unavailable.
- Verify carrier coverage at your installation site before committing to a plan, and test with a trial SIM to confirm adequate 4G LTE signal strength.
- Monthly data plans ($10–$25 per camera) suit continuous or frequent recording, while pay-as-you-go options work better for motion-only or snapshot monitoring.
- A single 1080p camera consumes 1–3 GB monthly with continuous recording, so test your actual usage during a trial period to avoid unexpected overage charges.
- Mount your camera first, insert the nano-SIM correctly, and test live view and motion alerts from a distance before final installation to ensure reliable connectivity.
What Is A 4G SIM Card For Security Cameras?
A 4G SIM card for security cameras is a cellular data module that gives your camera internet access via a wireless carrier’s LTE network instead of Wi-Fi. Think of it like a smartphone plan, your camera gets its own dedicated data connection. The SIM card (Subscriber Identity Module) contains credentials that authenticate your camera on the carrier’s network, letting it transmit video, receive commands, and send alerts directly over cellular frequencies.
Most 4G security cameras come with a pre-installed SIM slot ready to accept a card from major carriers like Verizon, AT&T, or T-Mobile. Once you activate a data plan on that SIM, the camera pairs with the nearest cell tower and maintains a persistent connection. This setup bypasses the need for Wi-Fi routers, ethernet cables, or even proximity to your home network, especially useful for garage cameras, driveway monitoring, or properties in rural areas where broadband is spotty.
Key Benefits Of 4G-Enabled Security Cameras
Independence from Wi-Fi. Your camera works even if your home network crashes, gets disconnected, or if an intruder jams your router. Cell towers provide redundancy that home broadband often can’t match.
Remote locations. If you own a cabin, vacation property, or equipment stored miles from the nearest internet service provider, 4G cameras are often your only option for real-time monitoring.
Faster setup. No routing cables, configuring mesh networks, or troubleshooting port forwarding. Activate the SIM, insert it into the camera, and you’re live within minutes.
Dedicated bandwidth. Unlike Wi-Fi cameras that compete with your streaming services and work-from-home video calls, cellular cameras maintain their own data channel. This means less buffering and more reliable alerts.
Easier outdoor placement. Weather-sealed 4G cameras can mount anywhere on your property, fence lines, outbuildings, or the edge of a driveway, without worrying about wireless signal strength degradation from obstacles.
How To Choose The Right 4G SIM Card For Your Camera System
Choosing a 4G SIM card involves three main decisions: which carrier, which data plan tier, and which plan type suits your monitoring needs.
Carrier coverage. Check the coverage maps from Verizon, AT&T, and T-Mobile on your property before committing. Stand where your camera will be mounted, pull up each carrier’s map on your phone, and verify you have at least 4G LTE (ideally 5G where available). Some properties sit in coverage dead zones: if that’s you, you’ll need to test with a trial SIM from multiple carriers. Most carriers offer 30-day trial periods at minimal cost.
Plan structure and costs. Cellular carriers offer plans in two flavors: pay-as-you-go and monthly subscriptions. Pay-as-you-go plans charge per megabyte and suit light-duty monitoring (snapshots only, motion alerts). Monthly plans, typically $10–$25 per camera per month, are better for continuous or frequent video clips. Watch for hidden overage fees, some carriers bill per MB, while others include bucket amounts (e.g., 2GB/month). Read the fine print and calculate based on your expected video quality and frame rate.
Consider a multi-camera plan. If you’re installing more than one 4G camera, ask about family plans or IoT data packages. Some carriers offer discounts when you activate multiple SIMs on a shared account.
Data Plans And Coverage Considerations
Data consumption varies widely. A single 1080p security camera recording continuously uses roughly 1–3 GB per month, depending on compression and frame rate. 4K cameras consume more, up to 8 GB monthly at full resolution. Most homeowners run motion-triggered recording or periodic snapshot modes, which cuts data use significantly. Before activating, test your setup for a week on a trial SIM and monitor actual usage in your carrier’s app.
Latency matters for live view. Cellular networks typically have 50–150ms latency (delay between when something happens and when you see it on your phone). This is acceptable for security alerts but noticeable if you’re trying to pan or zoom live. Wi-Fi cameras often deliver snappier live view, though 4G is improving.
Network congestion in busy areas. Urban areas with heavy cellular traffic can experience slower speeds during peak hours, affecting video quality and upload speed. If you live near a stadium, concert venue, or heavily populated zone, test before finalizing your plan. One of the detailed product reviews like the Eufy 4G LTE Cam S330 review can show you real-world performance in different settings.
Installation And Setup Tips For DIY Homeowners
Mount your camera first, activate SIM second. Position your camera and test its signal strength at that location before paying for a plan. Use the camera’s signal indicator (usually displayed in its app or on the device itself) to confirm you have at least 3–4 bars of 4G coverage.
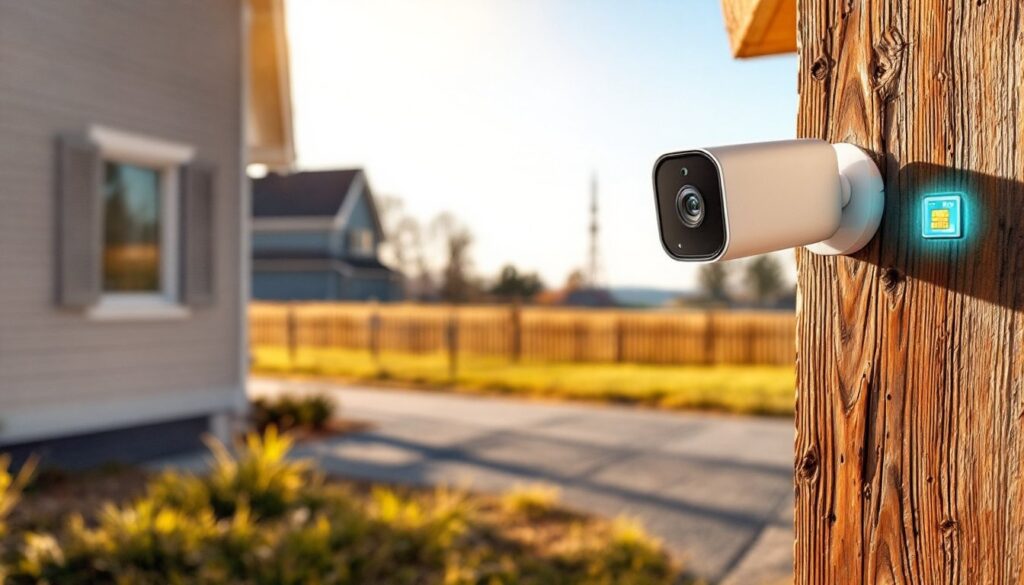
Format and insert the SIM correctly. Most security cameras use nano-SIM cards (the smallest standard size). If your carrier gives you a full-size or micro-SIM, pick up an inexpensive adapter from any electronics retailer. Power off the camera, insert the SIM into the slot (usually on the back or bottom), and power it back on. The manual should diagram the orientation: pushing too hard won’t help, and forcing it risks damaging the contacts.
Activate the SIM through the carrier before mounting. Call your carrier’s IoT/security support line or log into their website to activate the SIM card. You’ll need the ICCID (printed on the SIM) and will choose your data plan during activation. Allow 15–30 minutes for activation to propagate across the network, cellular handshakes take time. Place the powered camera indoors near a window and wait for the signal indicator to show connectivity.
Configure the camera’s app and network settings. Once the camera detects the SIM and connects to the network, download its manufacturer app (Eufy, Ring, Arlo, etc.) and pair the camera. You’ll be prompted to create an account, set recording preferences, and enable push notifications. Most 4G cameras let you select between continuous recording, motion-triggered recording, or snapshot modes, choose based on your data plan.
Test live view and alerts before final mounting. Stand far from the camera, trigger motion detection, and verify that alerts reach your phone and that live view streams without stuttering. If response time feels sluggish or you’re not getting alerts reliably, check your data plan tier and signal strength. Weak signals can cause timeouts and missed notifications.
Seal any openings and weatherproof connections. If your camera has an exposed SIM slot or battery compartment, use silicone caulk or weatherproof tape to keep moisture and debris out. The SIM itself sits in a protected slot, but the surrounding area should be sealed if the camera will face rain or humidity.
Common Challenges And How To Troubleshoot Them
Poor signal strength. If your camera shows 1–2 bars of signal, consider relocating it a few feet or upgrading to an external antenna if your model supports one. Some homeowners mount cameras higher or angle them toward the nearest tower for better reception. Indoor cameras often get weaker signals than outdoor ones: move them to a window-facing wall if possible.
Camera won’t connect after SIM insertion. Power-cycle the camera by holding the reset button for 10 seconds. If it still won’t connect, verify the SIM is fully seated (it should click into place) and that your carrier’s activation is complete. Call your carrier’s support line with the ICCID from the SIM: there may be a provisioning delay or account hold.
Unexpected data overages. Most homeowners underestimate consumption at first. If you’re hitting overages, switch to motion-triggered recording or lower video quality settings in the app. Continuous recording in 4K will drain your data plan in days. Check your carrier’s data usage portal daily for the first two weeks to establish baseline consumption.
Dropped connections or intermittent outages. Cellular networks can have brief lapses, especially during peak hours or bad weather. If your camera disconnects multiple times per day, test with a different carrier’s trial SIM if feasible. Some coverage areas genuinely deliver poorer reliability than others. Alternatively, add Wi-Fi as a fallback if your property has decent broadband, many modern cameras support dual connectivity.
Video quality degradation. When signal weakens or data limits approach, your carrier may throttle speeds, causing the camera to drop to lower resolution or frame rate. This is frustrating but protective: it keeps your camera connected rather than dropping entirely. If you need consistent quality, upgrade to a higher-tier data plan.
When troubleshooting, have your camera’s model number, SIM’s ICCID, and carrier account number handy. Support specialists will ask for these. Also note that building codes don’t typically mandate permits for camera installation unless you’re running electrical conduit or modifying structural elements, but check your local jurisdiction, as rules vary. For the latest insights on 4G camera reliability and performance, Digital Trends regularly publishes updated reviews and comparisons.
Conclusion
A 4G SIM card gives your security camera genuine independence, especially when Wi-Fi isn’t reliable or available. Choose your carrier based on verified coverage at your installation site, pick a data plan matching your recording habits, and follow proper setup procedures to avoid activation headaches. Test everything before permanently mounting, and monitor data usage closely in the first month. With those foundations in place, you’ll have a responsive, dependable camera system that keeps working even when the power flickers or your internet drops.